A quick note, as I review this post… it’s amazing how varying colors are between photographs, even the ones that have been “corrected”. I will say, that you have to see this piece in person to really appreciate just how great the final product is… Now, the rest of the story:
Back in December, I received a call to create a “duplicate” of a picture. I thought, okay, I’ll just scan it in, make a print, and we’re done – simple!
Not quite, it wasn’t a picture, rather it was a wood-inlay of a castle in Newark Scotland.
That changed the scope a bit, not a quick scan and off to the printer.
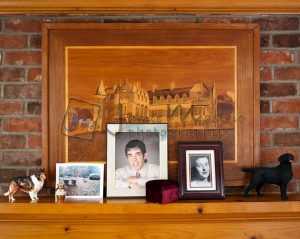
Come to find out, this was a pretty big piece and was hanging over the mantle of the client’s house. A beautiful piece for sure, created back in 1956 by a sheriff that lived near the castle.
This piece has sentimental value to the client, who wanted to make an “exact” duplicate of the piece to give to his children.
The challenge, was trying to get as close to the size (which was an odd shape to begin with something like 37″x26″. So, I had to try to get it around that size, and the size we agreed upon was 30″x40″.
The first challenge I immediately ran into was the location, while I could have moved the picture, I though it best not to potentially damage the piece. So, I set up my tripod about 10 feet away from the mantle and set the height so that the camera was eye-level. This was so I could keep the perspective of the piece in-tact and not have a skewed image.
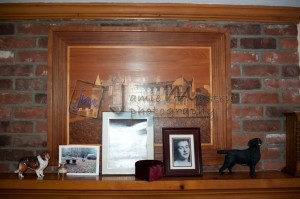
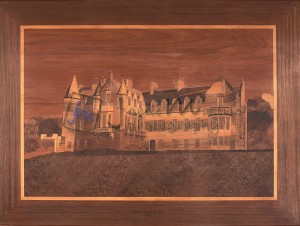
The next challenge with lighting. This was the very first shot I took:
I couldn’t tell when the piece was sitting nicely on the mantle, but being wood, it had a nice coat of varnish on it, which, when fired upon WOULD show the flash! It was like shooting into a mirror.
For the shot without the flash glare, I took it with my external strobes, one on each side, about 10 feet from the subject on a 30 degree angle to the wall.
Once I got my basic settings down, with the ISO, shutter speed and F-stop I started snapping away.
I took dozens of shots with the 35-70mm f/2.8. And then a few dozen with my 105mm f/2.8. The sun kept going in and out and was reeking havoc on the shots. The glare was a bit of a problem, and (unfortunately) there wasn’t enough sun to use ONLY the sun to light the picture.
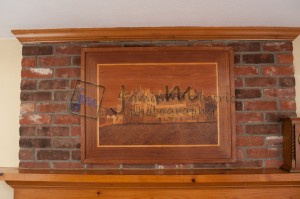
Even though I took as many safeguards as I possibly could, I still wound up with some distortion. I shot this with my D700 35-70mm f/2.8 lens. Shot at f/5.6 at 1/125 @ 200 ISO.
Through the many series of shots, I actually wound up using the images I shot with my 105mm f/2.8 lens. They had less lens distortion, and were just a tiny bit sharper (because they were closer).
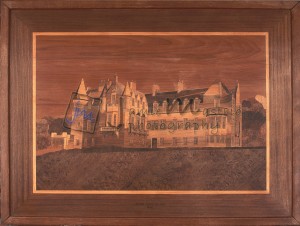
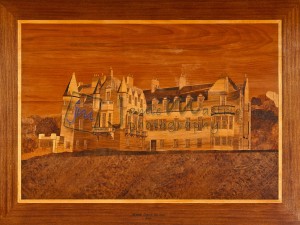
This is the cropped image:
I started out using the frame with the shot, because I thought I would print it with the frame in-tact. After showing a sample print I made with my CanonPro 9000II, we decided that I would strip off the frame and crop the image so that it would fit into a 30″x40″ print, which would most closely mirror the existing picture.
The one thing I failed to mention to this point was the amount of work I had to do in Photoshop. In realizing that there was some distortion, when I made the initial crop (to get the background out and just have the picture IN the frame). I had to do a ton of transforming in Photoshop. Luckily, I had lots of straight lines on the picture to use as my guides! I was able to use a couple of tools, such as Skew, Distort and Perspective to get it just right.
Almost ready for the printer! Just had one last adjustment to do, well a couple actually… I had to color-correct the image, and I hit it with a couple of the Lightroom presets like Punch and then adjusted the contrast a bit. Then, the last, last thing I did before exporting the final image and sending it to the printer was SHARPENING!
Since I had to upsample the image to make it fit to the 30″x40″ final size, I had to give it just a bit of sharpening to get rid of the pixelation that I saw. I was actually the only one that noticed that the image was a little “soft”, so I probably would have been fine just as it was, but because I’m a perfectionist…
This is the final image as it went to the lab:
The lab I use is absolutely amazing, they were able to turn around the image in no time flat! I placed the order on a Friday morning, and I received the prints – two of them, mounted on 3/8″ backing, and Lustre coated THE FOLLOWING MONDAY! Simply amazing.
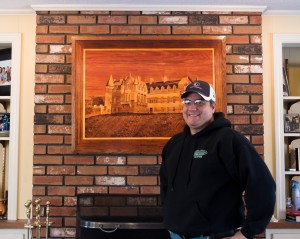
I had a local framer custom-make two oak frames and stained them to match the print. I picked them up today and will be delivering them this week. Just to show you the final finished size, here is my last shot with me standing next to it – up on my fireplace!
I loved working on this project! This was one of those unique projects that makes being a photographer something special.


